What to do with a website that has lost most of its traffic? There is SO much you can do with it, but here is a surprisingly simple way to repurpose it.
For one website of mine, instead of letting my 300+ blog posts go to waste, I took a step back and thought, “How can I use all of this valuable content in a new way?”
The answer? Turn it into an email newsletter that sends readers back to my website—where I monetize through affiliate links and ads. With the help of AI, I was able to streamline the process.
I put this article together because a lot of people are talking about Scott Delong’s Email Newsletter Course. I took his course and got a lot out of it.
One person mentioned that they didn’t have enough time to implement it. That’s what made me think of sharing this process with you guys. It doesn’t take much time if you have an HCU-hit site.
Here’s exactly how I did it:
Quick Navigation
- Step-by-Step Process
- Step 1: Feed ChatGPT With Detailed Info About Your Website
- Step 2: Organize Your Content in a Spreadsheet
- Step 3: Use an AI Writer to Draft Your Emails
- Step 4: Add a ‘Tip/Quote/Stat of the Day’ for Extra Value
- Step 5: Upload to ConvertKit and Add Images
- Step 6: Refine and Streamline the Process
- Step 7: Automate Your Sequence
- Step 8: Write a Long-Form Welcome Email
- The Process
Step-by-Step Process
Step 1: Feed ChatGPT With Detailed Info About Your Website
To get started, I fed ChatGPT all the info I could about my website and myself as the author. This included:
- My homepage text
- The About page
- A few key blog posts
- My social media profiles
- Email content I had previously sent to my audience
The more context you provide, the more accurate and tailored the AI’s email outputs will be.
Pro Tip: Turn all of this into a custom GPT!
Step 2: Organize Your Content in a Spreadsheet
I created a spreadsheet listing all the blog posts I wanted to link to from my newsletter. This gave me a clear overview of my content and made it easier to manage the email sequences.
Pro Tip: Categorize your articles by theme. This helps you create focused emails around specific topics, making the newsletter more cohesive for your readers.
Struggling with traffic? This free e-book reveals how to build a stable platform and grow your audience.
Step 3: Use an AI Writer to Draft Your Emails
Once I had the content organized, I asked Cuppa to draft the email content. I outlined the entire process for this HERE. FYI – Cuppa just released a new Hobby plan for only $15/month!
But, you could also use ChatGPT. I tried it out, just to test it. Here’s how I structured my prompt:
- Provide an engaging introduction related to the articles’ theme
- Write 2-3 sentences summarizing each blog post (with links)
- Conclude the email with a call to action to drive clicks back to the site
Remember, you’re trying to drive people to your website so you can make money on ad revenue.
The result? An email that was 80-90% ready, which saved me hours of work.
Step 4: Add a ‘Tip/Quote/Stat of the Day’ for Extra Value
After the intro, I included a small section called “Tip of the Day” or “Stat of the Day” to offer subscribers a quick nugget of value.
This might be a relevant statistic, a motivational quote, or a tip related to the email’s topic. It keeps the content engaging and helps retain reader interest.
Is this necessary? No. But I’m always looking for ways to personalize and/or upgrade my content.
Step 5: Upload to ConvertKit and Add Images
I pasted the email copy into MailerLite and set up the Automation sequence. Nowadays, I’d pick ConvertKit and their free plan for up to 10k subs. But either works just fine for me.
I added images to break up the text. These images can either be from the blog posts themselves or AI-generated if you need extra visuals.
Adding visuals not only makes the email more appealing but also helps guide the reader’s eye toward your links.
If you don’t have good visuals on the site you might want to consider it! Certain niches and topics do really well on Pinterest, and this might be another great traffic source for you.
Step 6: Refine and Streamline the Process
Like anything, the first few emails took a bit of back-and-forth to fine-tune the format, tone, and flow. Once I had a solid structure, I was able to replicate it quickly and easily for future emails.
Having a clear template sped up the process, allowing me to focus on tweaking content rather than starting from scratch each time.
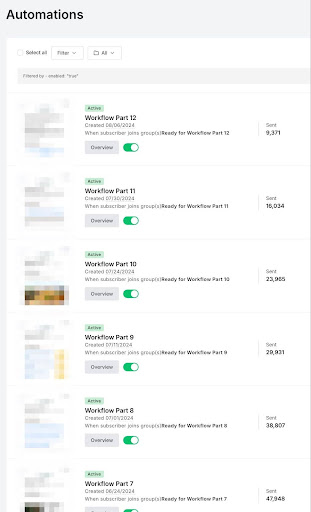
Step 7: Automate Your Sequence
With several emails drafted and ready, I set them up in MailerLite to send out automatically.
The automation was set on a weekly cadence to ensure my subscribers received consistent value without feeling overwhelmed.
Step 8: Write a Long-Form Welcome Email
The welcome email is your first introduction to new subscribers, so I took extra time to craft this one. In this email, I shared my personal story, the goal of the newsletter, and what readers could expect moving forward.
I made sure to include my lead magnet in this email so that new subscribers could access it immediately upon joining.
The Process
By following these steps, I was able to repurpose my website content into a high-performing email sequence that drives traffic back to my site, where I continue to generate revenue through affiliate links and ads.
It truly is set and forget.
The best part? This process was scalable and allowed me to turn my lost traffic into an opportunity.
If you’re sitting on a goldmine of content, I def recommend you give this approach a shot. You might be surprised how much value you can extract from what you’ve already built.
Hit reply if you have any questions about the specifics—I’d be happy to chat through how this can work for your situation.
P.S. I learned a lot of these tips from Scott Delong’s Email Newsletter course. Consider picking it up to make this process super simple!