
Let’s talk about writing articles. By now, you should be using AI in some parts of your content creation.
I seriously doubt if you could use 100% AI for it. Churn and burn content, yeah. But that is not an advisable long term strategy, at least not from me.
But if you’re not using it to help your content creation, then you’re going to fall behind on audience building. That takes a heck of a lot more time than it used to.
To be clear, we use this same process (with a few minor adjustments) for BOTH blog content and newsletter content.
Here is how we use Koala AI Writer to create personalized content at scale. If you want to try out the AI writing software, using code “JARED” will get you 15% off.
Quick Navigation
1. Generate an Outline with ChatGPT
Once I’ve determined a topic I want to write about, I first use ChatGPT to generate an outline.
You might be wondering why I don’t have Koala automatically generate the outline for me within its platform. To be clear, Koala CAN create an outline, and for some topics, it does a great job.
However, I’ve found that the key to consistently getting a good article out of the gate with Koala is to make sure the outline is detailed and fully covers the topics I want to be included. With ChatGPT, I can go back and forth with it until I’ve refined the outline to where I like it, and then I can easily feed that into Koala.
Let’s put this into play with an example. If we were writing about a fitness topic, we might write an article about “7 Summer Outdoor Workout Ideas for Warm Weather.” Its hot where I am right now 🙂 In ChatGPT, I’d use a prompt like this to generate the outline:
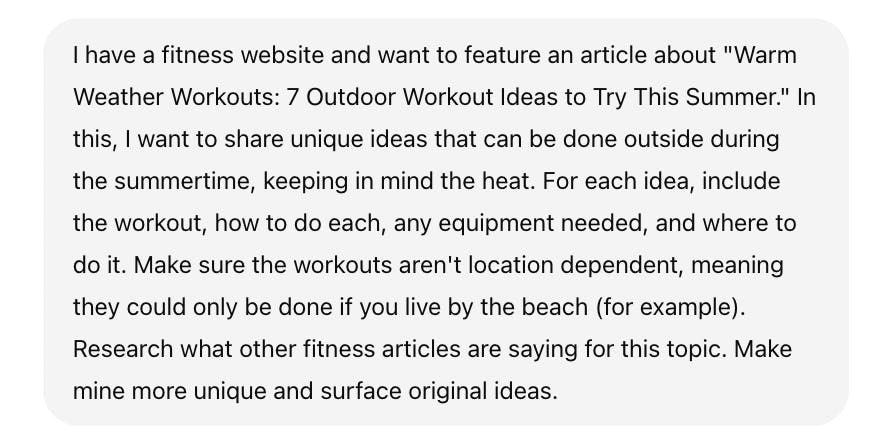
By using ChatGPT for the outline, I can tell it what I want to be included with each workout. I can also specify that I don’t want these tips to be super location-specific since my readers are likely all from different geographic areas.
You could even take this a step further. For example, if your readers mostly fall into a general age range, you could add that into the prompt so your outline becomes more specific for that group of people.
Note: Both ConvertKit and MailerLite have a polling feature within their emails, making it incredibly easy to gather more information about your readers quickly. You can use this to ask polled questions and learn about subscribers’ demographics, interests, etc, and then tailor content based on this. Definitely worth checking out!
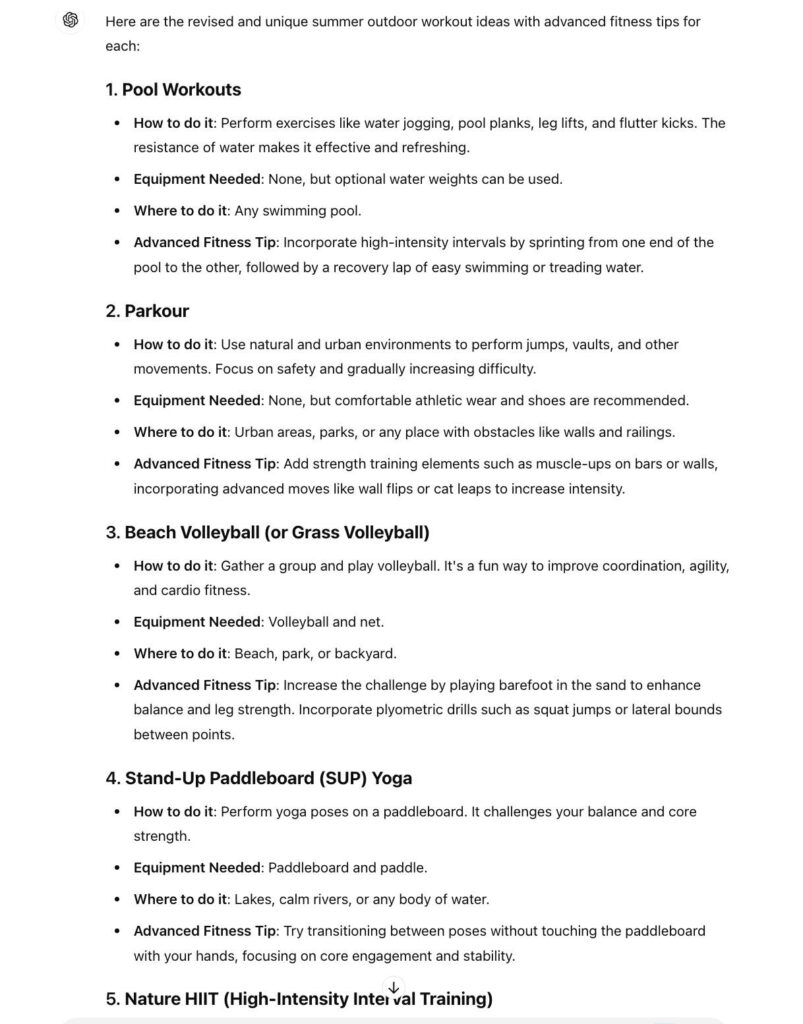
After going back and forth with ChatGPT a couple of times, this is what the outline looked like:
2. Select GPT-5 and Claude 4 Sonnet for Writing
Now that I have an outline generated, I’ll go over to Koala to build out the article. I’ll select “KoalaWriter” and add in my target keyword.
KoalaWriter now supports GPT-5 and Claude 4 Sonnet, and yes it’s a big deal.
The difference in tone, clarity, and instruction-following between these two models and earlier models is noticeable. It understands nuanced prompts better. It produces a cleaner structure. It feels less like AI trying to mimic a writer, and more like a writer with a keyboard.
And when you pair one of these models with Koala’s newer features like Deep Research (more on that below), you get articles that are not just readable… they’re accurate, relevant, and require far less revision before publishing.
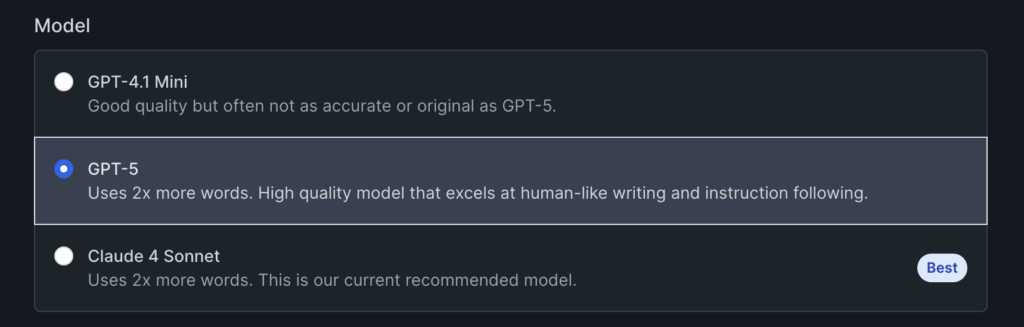
Both models are good and here’s a quick breakdown of some highlights of each:
- GPT-5: Follows instructions well and sounds more human-like
- Claude 4 Sonnet: Better formatting and introductions, along with more natural external linking
If you need precision and depth, go for GPT-5. For creativity and subtlety, choose Claude 4 Sonnet.
So, for example, we have several law firms that we work with. GPT-5 + Deep Research gives us a really solid base to build an article from.
We have another client that sells off-color greeting cards on Etsy and through their website. For them, we use Sonnet, and we don’t really need the Deep Research function.
And, it’s worth noting, as I’ve mentioned this quite a bit before. I don’t like the idea of publishing straight out of Koala. It really isn’t hard to add additional details that are both important and valuable.
Oh, and ALWAYS fact check!
3. Use Deep Research (With Real-Time Data + Source Controls)
Deep Research is probably the biggest difference in AI writing tools over the past year or so. For me, it’s because I always felt the need to add more depth to content that came out of these tools.
This is an actual time-saver if you’re creating content that needs to be both current and credible.
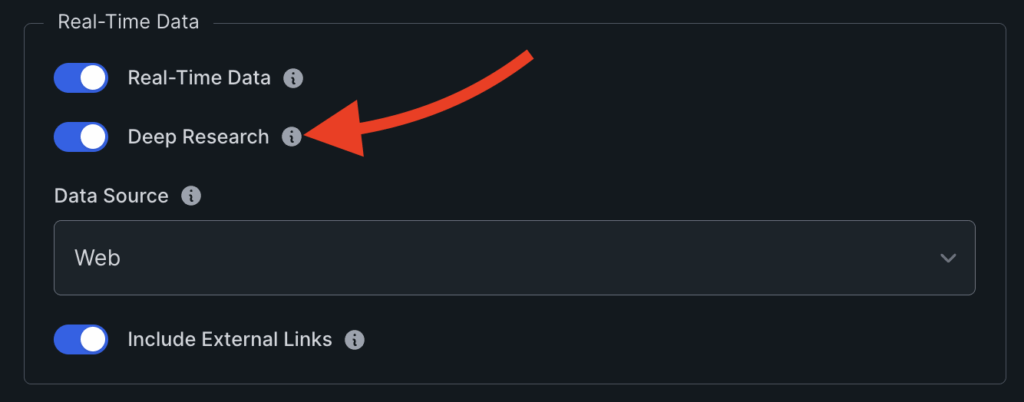
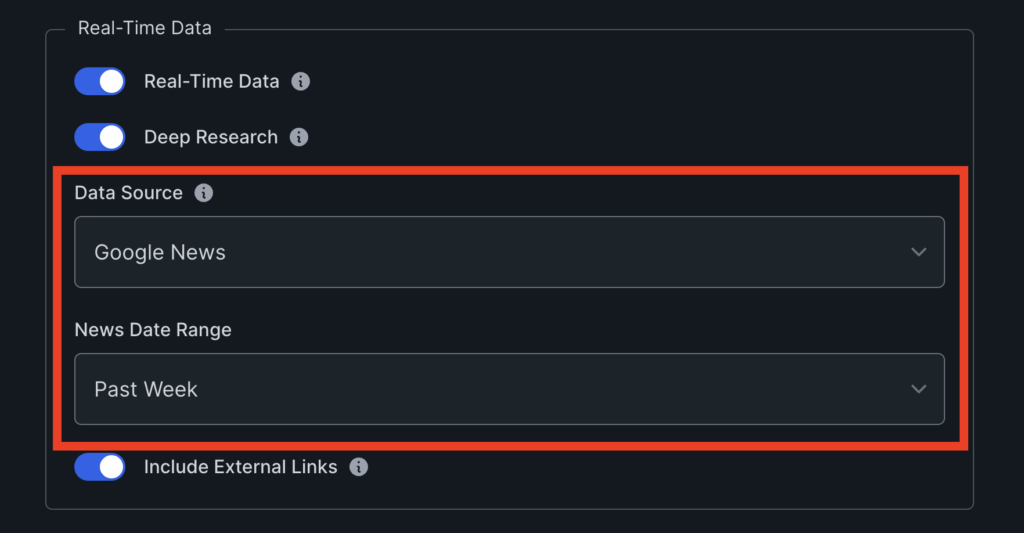
When enabled, Deep Research pulls updated, topically relevant information based on your main keyword or article focus. But what makes it actually useful is the control you have over your data source and timeframe.
For example, you can select Google News as your data source, then narrow the time range to, say, the last week. So if you’re writing about a recent shift in the stock market, or comparing the latest iPhones that were released, you’re not getting recycled content from 2021. You’re pulling in what just happened, without having to do all the research manually.
It also works well for health, finance, and current events, all topics that are typically more time consuming to write and fact check.
I’ve noticed this also helps reduce editing time by a lot.
4. Dial in Your Other Settings
I keep it pretty simple with the other writing options:
- Type of article: Pick the one that makes sense based on your topic. I’ll typically use “Blog Post” as it allows the use of custom headings.
- Automatic Internal Linking: This needs to be set up, but it’s quick and easy to do. I turn this on as it creates some internal links to relevant articles.
- Tone of voice: I find that “friendly” works well
- Point of View: First person singular
- Article Length: I usually choose Medium or Long Form
- Improve Readability: I toggle this on to keep sentences short and easy to read.
For the “Custom Outline,” this is where I’ll copy/paste the details from ChatGPT.
In this case, I’d enter each of the 7 main topics as a new heading along with a conclusion heading. Each H3 will go under the main topics with “H3” in front of them.
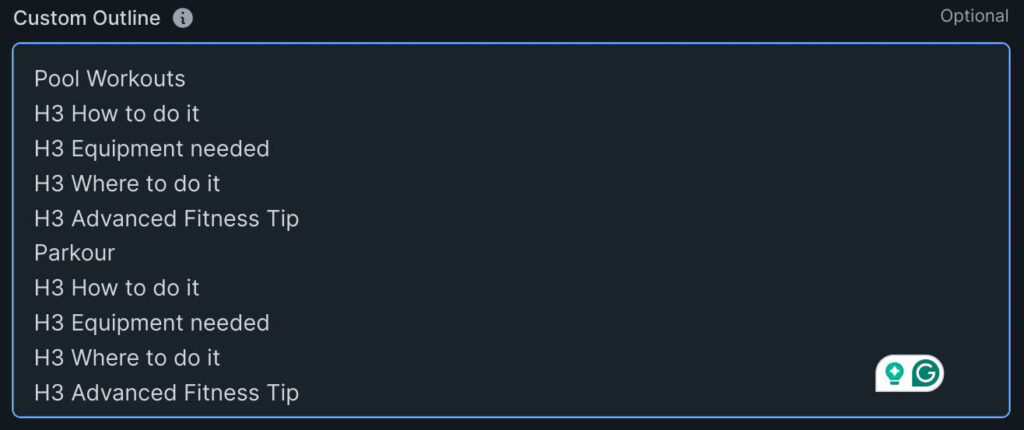
Once I’ve done that for all of the headings, I move down to the “Extra Section Prompt” option. The only thing I do here is to update it to help make the content a little more personable and give Koala certain AI words to avoid.

From here, I’m ready to create the article.
As a note, you could have Koala automatically generate AI images and embed YouTube videos for the article if you wanted to. I find this to be hit and miss in terms of the images it generates and videos it recommends, but since it’s included, I recommend testing it out for your niche to see how it does.
Personally, I use a mix of unique images I’ve taken and ones generated by Midjourney, but Midjourney can be cumbersome at times (and is a separate subscription and platform).
5. Review and Finalize Output from Koala AI
Once Koala generates the article, I read through it to make sure it looks accurate and doesn’t sound too much like AI. Remember, I’m not trying to get this article to rank, but I still want it to sound realistic, authentic, and have good tips throughout.
Use Polish Mode with Custom Instructions
Polish Mode has been around for a while, and it’s a quick way to clean up articles by removing mid-article conclusions, trimming repetition, and improving overall readability.
And now, it’s gotten even better, because you can add custom instructions.
Want an article to sound more casual than the standard “friendly” tone? Just tell it. You can say, “Make this tone super laid-back and conversational,” and Polish Mode will rewrite with that in mind, without breaking structure or flow.
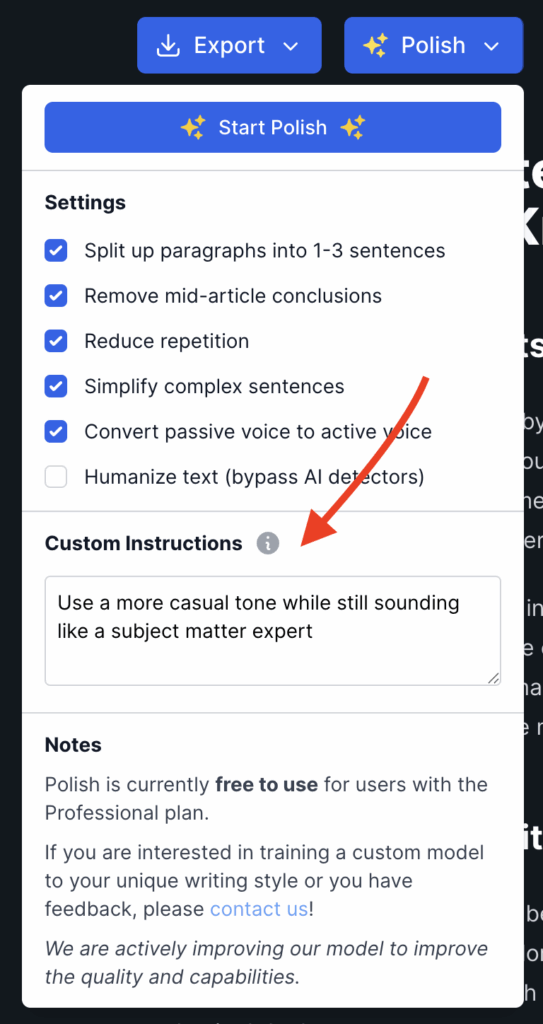
The value here is that you can now hit publish faster with a final version that better matches your brand voice, without having to manually tweak the tone paragraph by paragraph.
I will give the article a look-through at this point. I may clean up the heading structure a bit, or look for any sentences that sound too much like AI (we all know what those are at this point).
This is the step where I add in my own personal insights. Or, if I’m working with an expert, then I’ll pull in their insights.
I’ll also try to add in a table or two to help with readability, and embed a relevant YouTube video.
Finally, I usually rewrite the introduction. For some niches, you can create a new introduction with a special ChatGPT prompt. But overall, the intro needs to be really engaging to keep people reading. I find being personable and personal here helps.
6. Final Steps
At this point, the article is ready to send to a VA to have them add images, do some basic internal linking with Link Whisper, and publish the article on my site (or send out as a newsletter).
Overall, Koala paired with ChatGPT works well for this type of content. This process is very simple to streamline and it’s easy to create content much quicker. Use code “JARED” for 15% off.
We’re constantly testing different AI writing tools to see what produces the best results for the articles we’re writing, and Koala continues to impress us.