If you use ConvertKit and Squarespace, you may wonder whether you can integrate them. In this post, I’ll provide instructions on successfully embedding a ConvertKit form into Squarespace. Doing so can help you grow your email list and improve your marketing.
Quick Navigation
How to Embed a ConvertKit Form Into Squarespace
You can use this step-by-step guide on embedding a ConvertKit form into Squarespace, seamlessly integrating your email marketing efforts with your website. Follow these clear instructions to enhance user engagement and streamline lead capture on your Squarespace platform.
- Log in to ConvertKit
- Click “Landing Pages & Forms,”
- Click on “Create New” to make a new form
- Choose “Form > Inline” to select a template
- Customize your form with the form builder
- Click “Embed,” and copy the code
- Head to Squarespace and add a code block
- Paste the code where you would like to place the form
- Click “Apply > Save
Integrating your ConvertKit form into Squarespace is a straightforward process. Following these simple steps, you can effectively create a professional form to grow your subscriber list.
After embedding the form, remember to test it to ensure it functions properly. It is important to note that both platforms often make updates, so you need to check periodically for any changes that may influence the embedding code process.
Finally, remember to be on Squarespace’s Business or Commerce plan for this to work out.
Step 1. Create a ConvertKit Form
First, log in to your ConvertKit account, find “Landing Pages & Forms” on the main menu, and click on it. You can now select your form or create a new one.
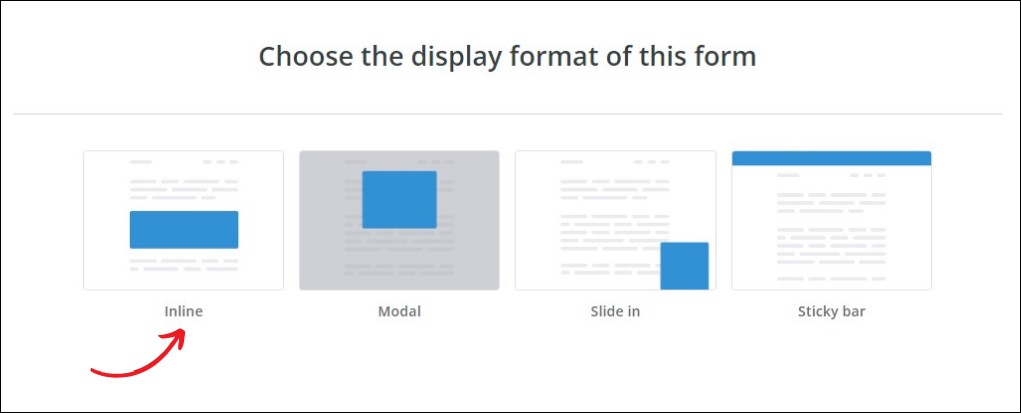
If you decide to make a new form, click the “Create New” button on the right side of the page. Next, click on “Form” and select “Inline” to choose a template.
To begin customizing your form, click on the “Settings” tab at the top of the page. To learn more about creating a form on ConvertKit, you can check the ConvertKit video.
Step 2. Customize The Form
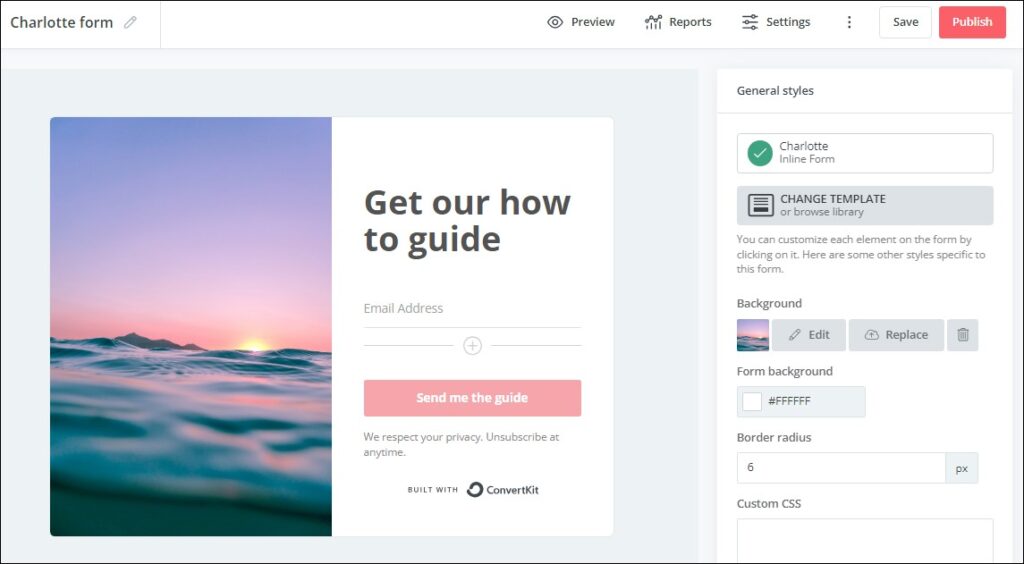
Choose whichever template you like and click on it. ConvertKit will then take you to a page where you can customize your form to match your brand style.
This means you can choose a color for the background, change the border radius, and select a suitable font and image.
You can opt for a simple inline form that appears on one position on the page or goes for a modal pop-up form that appears over the page. ConvertKit also has slide-in forms and sticky bar forms.
Select the form type according to your needs, preferences, and branding. You can also add custom CSS to align with your brand as a creator or a business owner.
Step 3. Adjust Form Settings
You can show a success message if you click on the “Settings” symbol from the panel on the right. You can also redirect your new subscribers to an external page on your website, such as a custom “Thank You Page.”
The platform enables you to select options such as sending an incentive email or auto-confirm new subscribers. You can also choose to hide the form after someone subscribes if you don’t want them to be able to see it.
Step 4. Copy The Embed Code
Once you finish designing your form, you can proceed to click on the “Embed” tab. The email marketing platform will provide you with an embed code that you will need to insert into the Squarespace website.
At this step, you will be able to see a Javascript or an HTML code. It contains all of the necessary elements to display the form on your Squarespace site. Copy the code by clicking “Copy” or pressing Ctrl+C (Windows) and Command+C (Mac).

Step 5. Access Your Site
At this stage, you need to log in to your Squarespace account. On the dashboard, select the website where you would like to integrate your ConvertKit form. Click on the “Edit” button at the top right of the page to access the page editor.
Step 6. Add A Code Block
In Squarespace, you can integrate a custom code using a code block. Hence, to add your code, select the “Code” option from the menu.
In the code block editor, paste the embed code you copied earlier. Ensure that the default code is removed and the ConvertKit form code is pasted.
After doing so, you can adjust the code block settings to display the form correctly if necessary. You can do so by clicking on the “Settings” tab. You can also disable “Display Source” if you don’t want the code to be visible on your site.
Step 7. Save And Publish The Form
Finally, click “Apply” to save all your changes. Preview the page to determine whether the form is displayed correctly. If everything is looking good, publish the page.
Depending on your goals, you can customize the placement of the form further. You can do so by using the Squarespace built-in design tools. This ensures the layout matches your branding and enhances the user experience.
Conclusion
If you are curious about how to embed a ConvertKit form into Squarespace, you can integrate it seamlessly by following the guide above. This simple process can help you capture leads and grow your email subscriber list. Using the ConvertKit features, you can grow your audience as a creator.